
How to Use the Wavytalk Power Wave: Settings, Sections and Fixes
 By Ashley Rubell Published
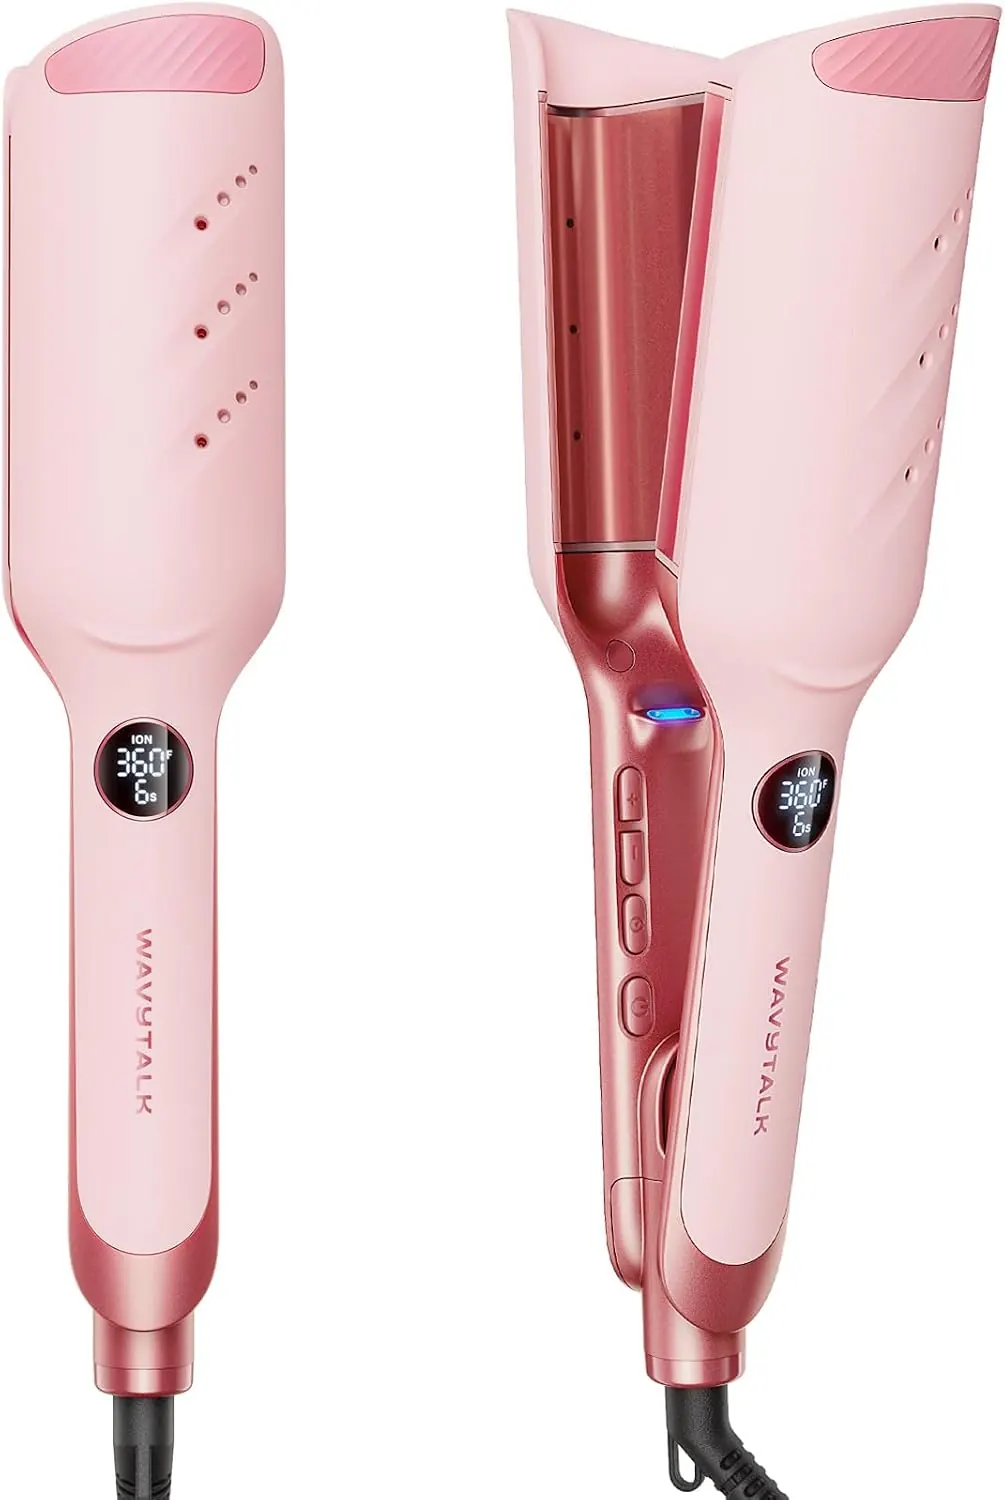
35mm deep V-shaped dual-barrel ionic waver with ventilation design, dual-channel negative
Shop now
The Wavytalk Power Wave hair crimper doesn't ask you to wrap hair around anything. You clamp a section, wait for the beep, open, move down and clamp again. The skill is mostly in picking the right heat and hold time, and that's where most first sessions go wrong.
What you're working with
Swipe sideways to see the whole table →
| Power Wave | |
|---|---|
| Plates | Deep V-shaped, 35mm, on 90mm-long barrels |
| Heat | 8 settings: 280, 300, 320, 340, 360, 380, 400, 420°F |
| Timer | 4 settings: 4, 6, 8, 10 seconds, with a beep |
| Display | LED, with a memory for your last settings |
| Power | 88W, 100 to 240V |
| Cord | 79 inches (2 m) |
| In the box | Crimper, two salon clips, temperature guide card |
The barrels are fully enclosed, which is Wavytalk's anti-scald design. You still get a pair of clips but no glove, so keep your fingers on the handle.
Is your hair the right length?
Wavytalk says the Power Wave suits hair from chin length to mid-back. Pixie cuts and other very short styles are usually too short to hold a clear wave pattern. For those, the Wavytalk Cool Curl Pencil or 0.3" Pencil Flat Iron is a better match.
Texture matters too. The Power Wave is designed mainly for straight and wavy hair. If your hair is curly or coily, Wavytalk suggests straightening it first, so the crimper presses its pattern into a smooth base.
Your first session, step by step
1. Start with dry hair
Hair should be clean and fully dry. If you use a heat protectant, let it dry down before you start. Damp hair is the main reason for the "smoke" people notice on their first try (more on that below).
2. Set up safely
Plug straight into a wall outlet. Wavytalk asks you not to use extension cords or share an outlet with other high-power devices, and to make sure the plug is pushed all the way in. Rest the crimper on a flat, heat-resistant surface between sections.
3. Choose your starting heat and timer
Look up your hair type on the temperature guide card that comes in the box and start there. As a rule, fine, bleached, color-treated or damaged hair starts low, while thick, coarse or resistant hair may need a higher setting. Pair a low heat with a short timer for your first few sections.
The memory function keeps your settings, so once you find a combination that works, it's waiting next time.
4. Section and clamp
Clip away everything except one layer. Take a section, clamp it close to the root, and hold until the timer beeps. Open the crimper fully, slide it down so the top of the plates sits at the bottom of the last wave, and clamp again. Keep going to the ends.
5. Check, then adjust
Look at the first couple of sections before doing the whole head. If the wave drops quickly, go up one heat step or one timer step, not both. If hair looks dry or frizzy, come down a step. Wavytalk's advice is to start short and adjust gradually.
Three things that confuse first-time users
The timer stopped beeping
This is normal. The timer resets when you open the crimper wide between clamps. If you only crack it open a little to move down, it doesn't reset and you won't hear the beep. Open it fully, or at least noticeably wider than before, for each new clamp.
Something that looks like smoke
It's steam. Moisture in your hair gets trapped between the plates, turns to steam and escapes when you open them. It shows up most on damp hair or in humid weather. Make sure your hair is fully dry, and drop to the lowest heat and shortest timer before working back up.
The waves look different from a regular crimper
They're meant to. The deep V plates make larger, defined waves with lift at the root, rather than the tight zigzag of a classic crimping iron. If you're not sure which look you're after, our crimper vs waver guide explains the difference.
When you're done
Unplug the Power Wave right after use and let it cool before you put it away. Don't leave it plugged in and unattended, even between sections.
More texture tools are in Wavytalk wavers.